
Fried cauliflower made easy with this crispy home method
The first time I made fried cauliflower, it wasn’t planned. It happened on a rainy day when some friends visited me unexpectedly, and they were hungry and noisy. I looked in the refrigerator and saw a single head of cauliflower, and I thought, why not fry it? The result was a crispy, golden snack that disappeared faster than I expected. Since then, it has become a family favorite.
Why You’ll Love This Recipe
- Crunchy outside, tender inside every bite hits the sweet spot of texture.
- It’s ridiculously easy to make. No fancy tools, no complicated techniques.
- You can serve it as a snack, side dish, or even a meat substitute.
- Kids devour it believe it or not, even those who don’t like vegetables.
Table of Contents
Ingredients List
You’ll need:
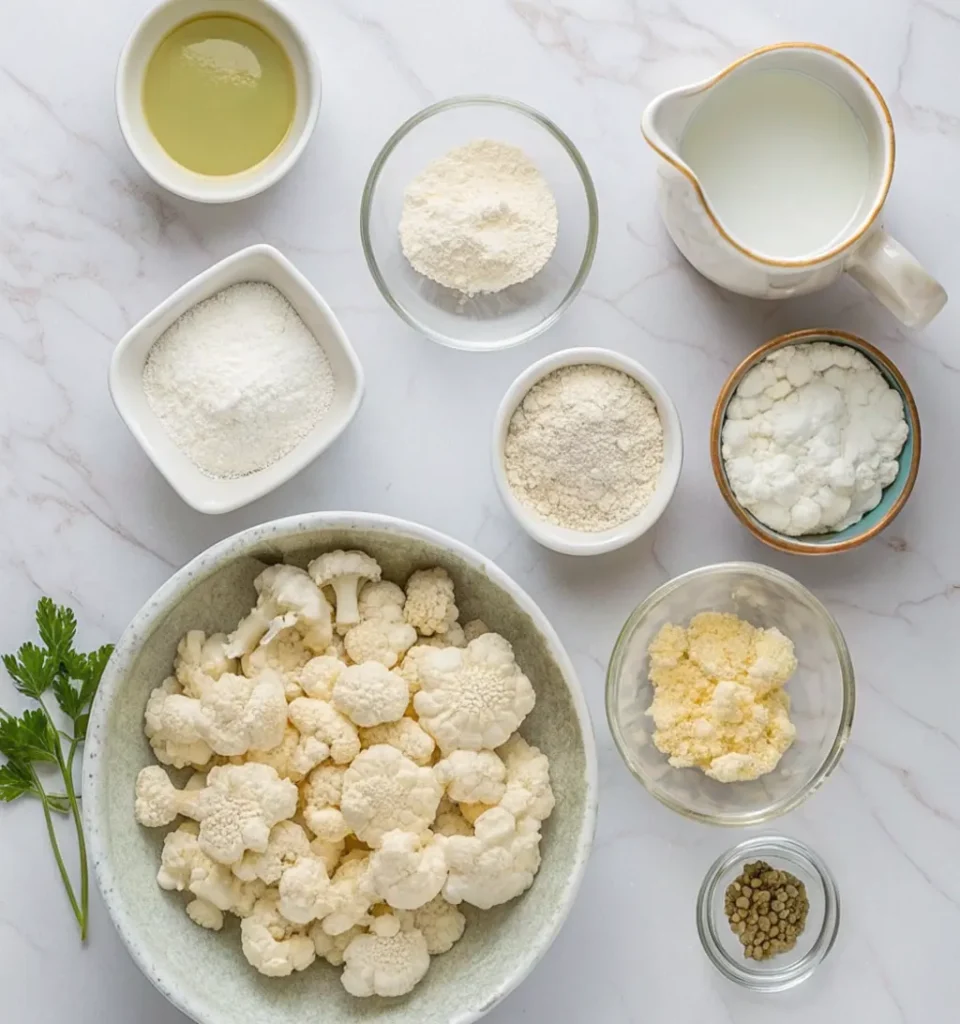
- head of cauliflower (cut into florets)
- all-purpose flour (for a crisp base)
- buttermilk (or milk + 1 tsp lemon juice, if you don’t have buttermilk)
- paprika (adds that subtle warmth)
- garlic powder
- Salt & pepper to taste
- Vegetable oil (enough for frying)
Optional Add-Ons
- Parmesan cheese (for a nutty finish)
- A pinch of cayenne (if you like a kick)
- Fresh herbs like parsley or dill (to sprinkle after frying)
Substitution Ideas
- Gluten-free option: use rice flour or chickpea flour.
- Vegan version: replace buttermilk with plant milk mixed with a bit of vinegar.
- Health twist: instead of deep-frying, air-fry or bake with a drizzle of oil.
What is fried cauliflower
Fried cauliflower is simply cauliflower florets coated in a light batter and fried until golden and crisp. It’s that perfect mix of crunchy outside and soft inside. Honestly, it’s the kind of comfort food that surprises you simple, budget-friendly, and seriously addictive. I’m not exaggerating when I say one bite usually leads to another.
Timing
- Prep time: 15 minutes (chopping, mixing)
- Cooking time: 10–12 minutes per batch
- Total time: About 25–30 minutes
How to Make fried cauliflower
Step 1: Prep the Cauliflower
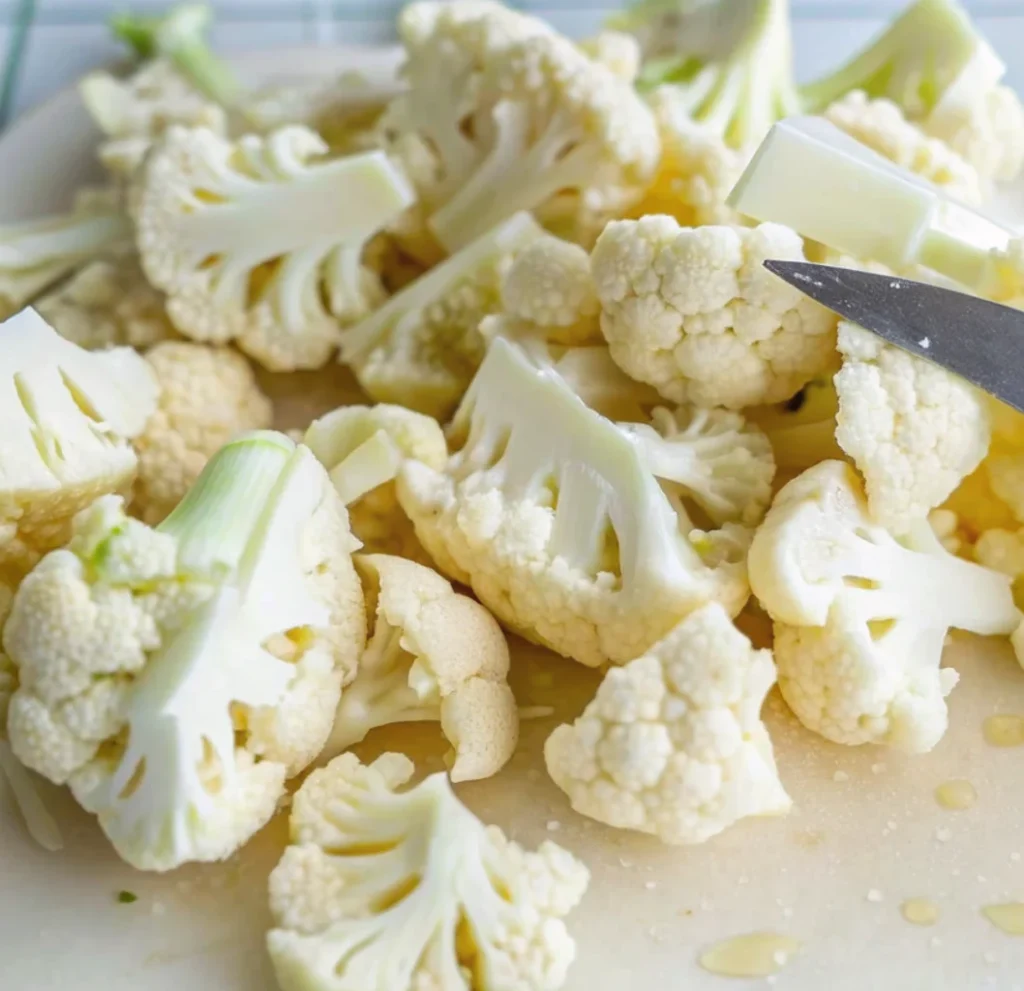
Wash the cauliflower and cut it into medium florets. Don’t go too small they’ll overcook and not too big either. Think bite-sized but substantial.
Professional tip: Soak florets briefly in hot water for 2–3 minutes to soften the texture and remove any bitterness.
Step 2: Make the Batter
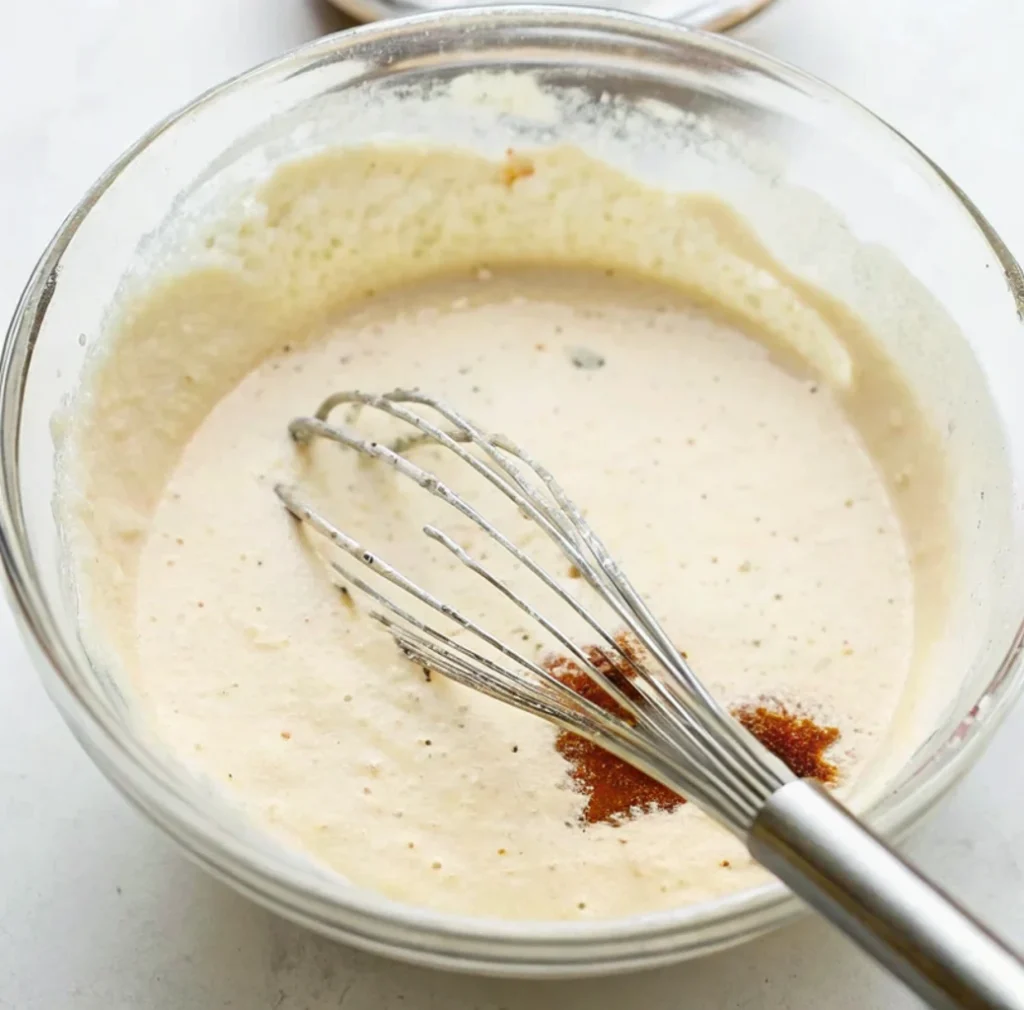
In a bowl, whisk together flour, paprika, garlic powder, salt, and pepper. Pour in buttermilk gradually while whisking until you get a smooth, thick batter. It should coat the back of a spoon nicely.
Professional tip: If the batter feels too thick, add a tablespoon of water. Too thin? Add a spoon of flour. You’re the boss here.
Step 3: Heat the Oil
Pour enough oil into your skillet about 1½ inches deep. Heat to around 350°F (175°C). You can test it by dropping a tiny bit of batter in; if it sizzles instantly, it’s ready.
And trust me, hot oil is your friend. Lukewarm oil = soggy cauliflower and nobody wants that.
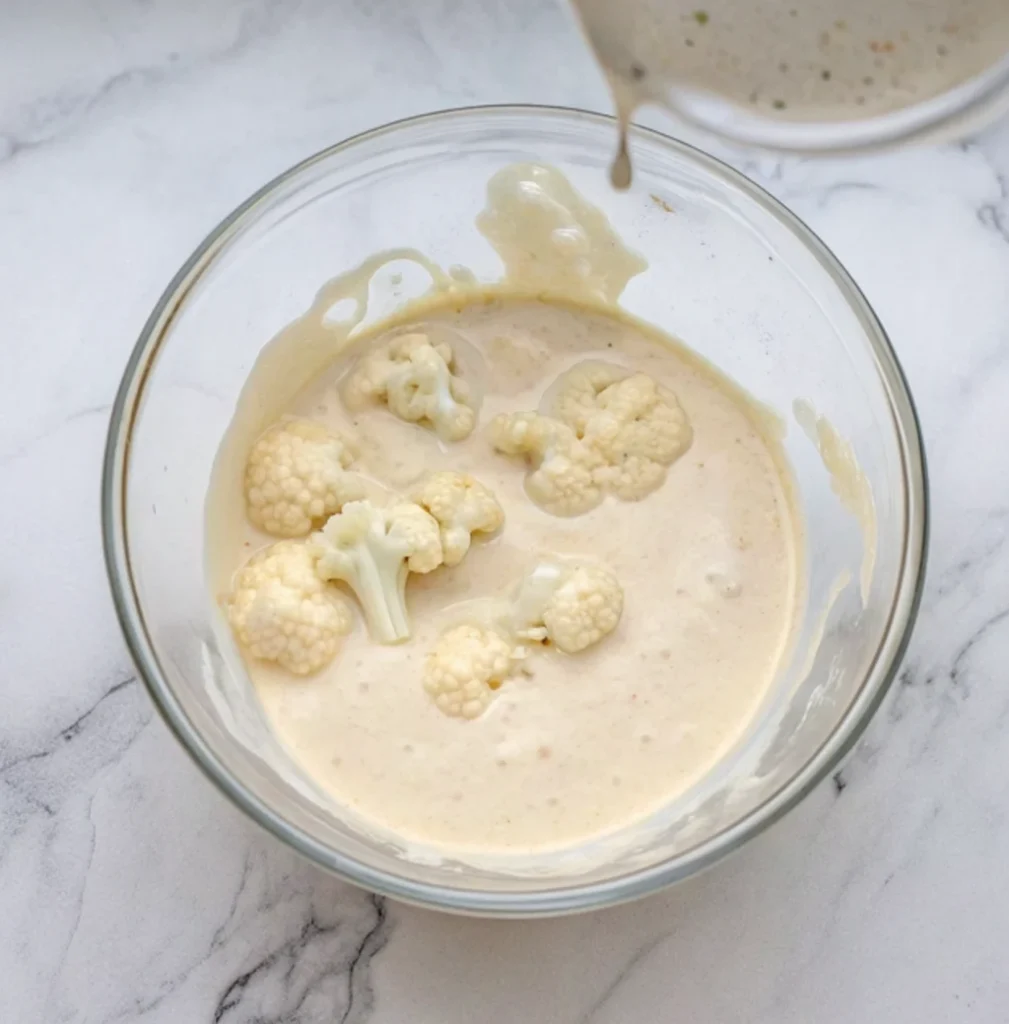
Step 4: Coat and Fry
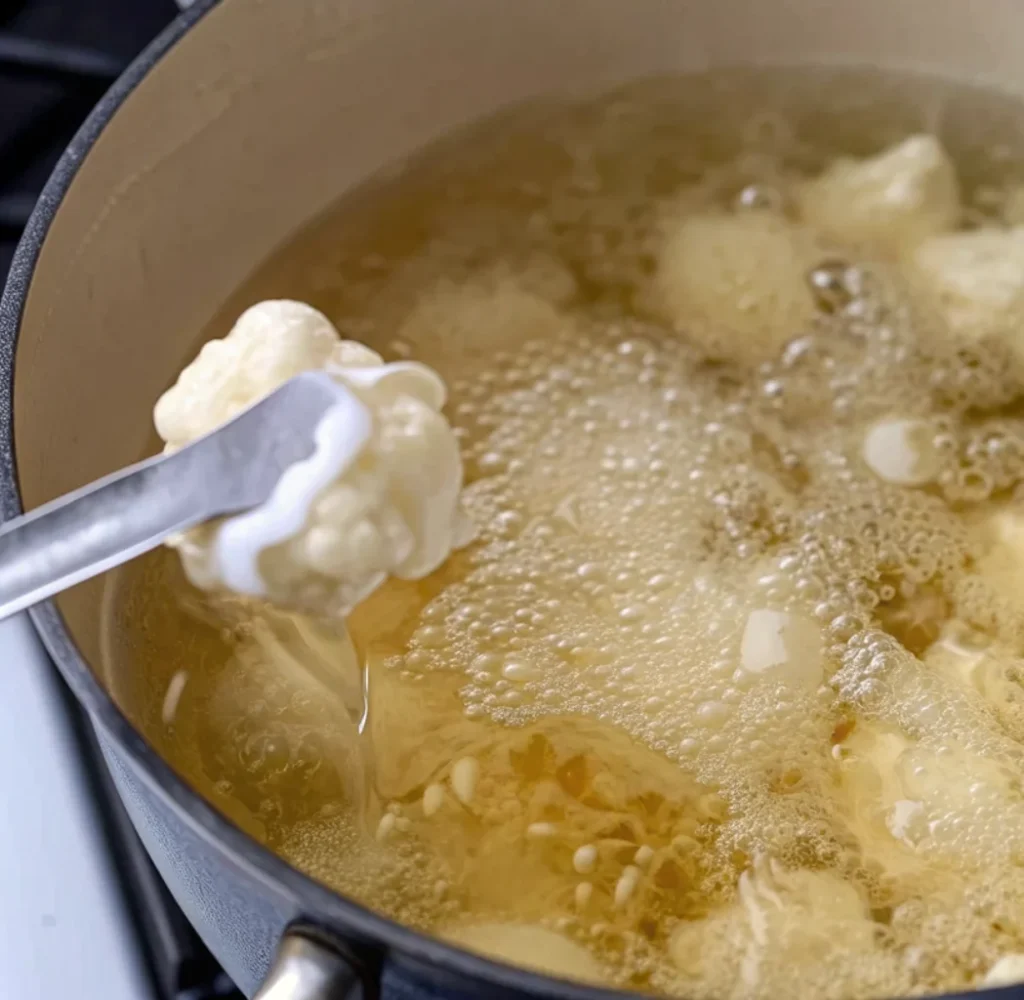
Dip each floret into the batter, letting excess drip off. Carefully lower into the hot oil. Fry in batches don’t crowd the pan or they’ll steam instead of crisping.
Fry each side for about 3–4 minutes, until they’re golden and irresistible. You’ll smell it before you see it.
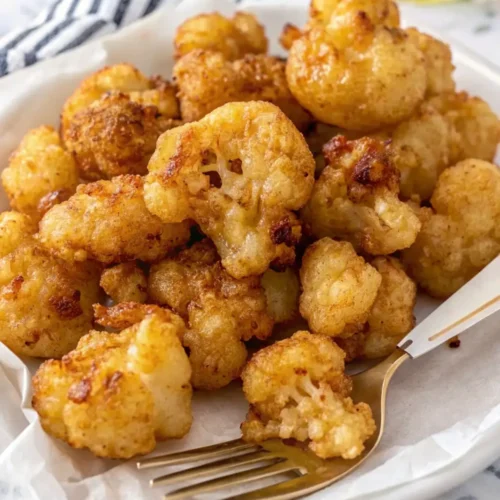
Step 5: Drain and Season
Transfer the florets to a plate lined with paper towels. Sprinkle a pinch of salt or paprika while still hot it helps the flavor stick.
Professional Cooking Tips
If you want to get that crispy on the outside, tender inside perfection every time, remember these tips:
- Keep the oil hot but not smoking (around 350°F is perfect).
- Don’t overcrowd your pan — the temperature drops fast.
- Always dry the cauliflower before dipping it into the batter.
- Let the fried pieces rest on a rack, not just paper towels, for extra crunch.
- Season right after frying — that’s when the flavors cling best.
How to Serve Fried cauliflower
Fried cauliflower is ridiculously versatile. You can dress it up or down depending on your mood.
- Serve it as a side dish with grilled chicken or burgers.
- Turn it into a vegetarian main with a creamy tahini dip.
- Toss it with buffalo sauce for a spicy game-day snack.
- Add a squeeze of lemon and a sprinkle of fresh herbs for a Mediterranean twist.
- Serve cold leftovers in wraps or salads — yes, they’re still amazing.
Personal note: Once, I tossed the leftovers in sweet chili sauce, added sesame seeds, and boom a brand-new dish. My guests thought I ordered takeout.
How to Store and Reheat
To store fried cauliflower, let it cool completely, then place it in an airtight container lined with a paper towel. Keep it in the refrigerator for up to 3 days. To reheat, avoid microwaving it makes it soggy. Instead, use an oven or air fryer at 375°F (190°C) for 5–7 minutes until crispy again. This keeps the coating crunchy and the inside tender, just like freshly made.
More Recipe Suggestions
- roasted fall veggies how to get them crispy
- Potato and green bean salad an easy and effective
- Mashed Potato Squash How To Make It Creamy And Light
- Mashed Potato Salad How to Make It Creamy
- The Best Fried Cauliflower
Nutritional Information
- Calories: 180–220 kcal
- Fat: 10–12g
- Carbs: 18g
- Protein: 4g
- Fiber: 3g
- Vitamins: Rich in Vitamin C and K
Fried cauliflower made easy with this crispy home method
Ingredients
- head of cauliflower
- all-purpose flour
- buttermilk or milk
- paprika
- garlic powder
- Salt & pepper to taste
- Vegetable oil
- Optional Add-Ons
- Parmesan cheese
- A pinch of cayenne
- Fresh herbs like parsley or dill
Instructions
Step 1: Prep the Cauliflower
- Wash the cauliflower and cut it into medium florets. Don’t go too small they’ll overcook and not too big either. Think bite-sized but substantial.
Step 2: Make the Batter
- In a bowl, whisk together flour, paprika, garlic powder, salt, and pepper. Pour in buttermilk gradually
Step 3: Heat the Oil
- Pour enough oil into your skillet about 1½ inches deep. Heat to around 350°F (175°C).
Step 4: Coat and Fry
- Dip each floret into the batter, letting excess drip off. Carefully lower into the hot oil.
Step 5: Drain and Season
- Transfer the florets to a plate lined with paper towels. Sprinkle a pinch of salt or paprika while still hot it helps the flavor stick.
Notes
Nutritional Information
- Calories: 180–220 kcal
- Fat: 10–12g
- Carbs: 18g
- Protein: 4g
- Fiber: 3g
- Vitamins: Rich in Vitamin C and K
FAQs
Can you cook cauliflower by frying it?
Absolutely! That’s what gives you that golden crust and soft interior. Frying locks in flavor and turns a simple vegetable into something crave worthy.
Is fried cauliflower still good for you?
To be honest with you, yes in moderation. It keeps many of cauliflower’s nutrients intact, especially when fried in good oil and not drenched.
How long does it take to fry cauliflower?
About 6–8 minutes per batch. Smaller florets cook faster, larger ones take a bit longer. You’ll know it’s done when it’s golden and crisp.
How do you make cauliflower crispy?
The secret lies in batter consistency and oil temperature. Dry florets, hot oil, and not overcrowding that’s your holy trinity for crunch.
Conclusion
the humble fried cauliflower, a dish that’s simple yet somehow special every single time. Golden, crispy, and full of heart. Try it once, and you’ll keep making it whenever you crave comfort with a crunch.
Bottom line? Grab that cauliflower, heat up your pan, and get frying.
If you loved this recipe, drop a comment below or share your twist on it.
Leave a Comment
Your email address will not be published.
There are no reviews yet. Be the first one to write one.