
What Is Ground Beef Bulgogi and How to Make It?
There’s something about gathering around the table that makes food taste better. The first time I made Ground Beef Bulgogi at home, my kids practically licked the plates clean. To be honest with you, I wasn’t expecting such a big reaction — it was a simple weeknight dinner. But the sweet, savory aroma filled the kitchen, and suddenly, it felt like a little celebration.
Why You’ll Love This Recipe
- Quick, easy, and ready in under 30 minutes.
- Bold Korean-inspired flavors without complicated steps.
- Budget-friendly since ground beef is more affordable than steak.
- Adaptable — add veggies, serve with rice, wrap in lettuce, or even toss into tacos.
- By and large, it’s the kind of dish that pleases both kids and adults.
Table of Contents
To Make Ground Beef Bulgogi You’ll Need
Essential Ingredients
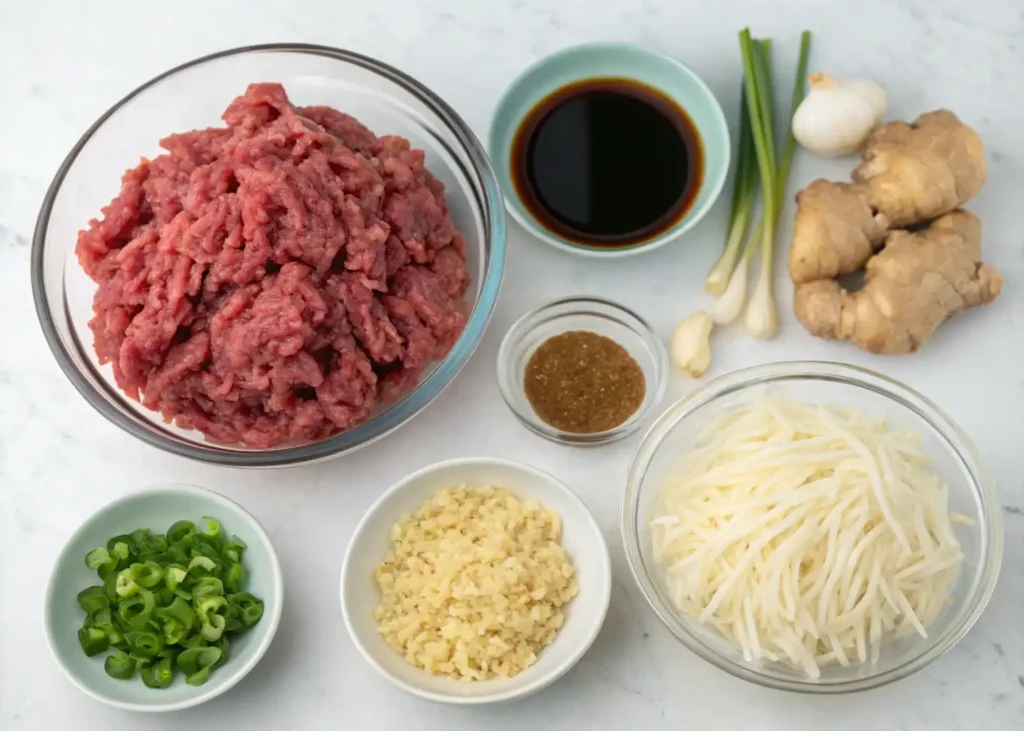
- Ground beef: Aim for 85/15 fat ratio. Leaner beef tends to dry out, fattier beef adds richness.
- Soy sauce: The salty backbone of the dish (tamari works if you’re gluten-free).
- Brown sugar or honey: Adds balance, a touch of caramel sweetness.
- Garlic & ginger: Fragrance in every bite. Don’t skip these.
- Sesame oil: Nutty, toasty, simply irreplaceable.
- Green onions: Fresh crunch, color, and brightness.
- Rice or noodles: Your base — fluffy white rice is the classic choice.
Possible Substitutions
- Swap beef for ground turkey, chicken, or even plant-based crumbles.
- Replace sugar with maple syrup or coconut sugar.
- Add chili paste (gochujang) if you like heat.
Recipe Options
- Wrap it in lettuce for a low-carb bite.
- Pile onto buns for a Korean-style sloppy joe.
- Toss with rice noodles for a quick noodle bowl.
Timing
- Prep time: 10 minutes
- Cooking time: 15 minutes.
- Total: 25 minutes
How to Make Ground Beef Bulgogi
Step 1: Prep the Aromatics
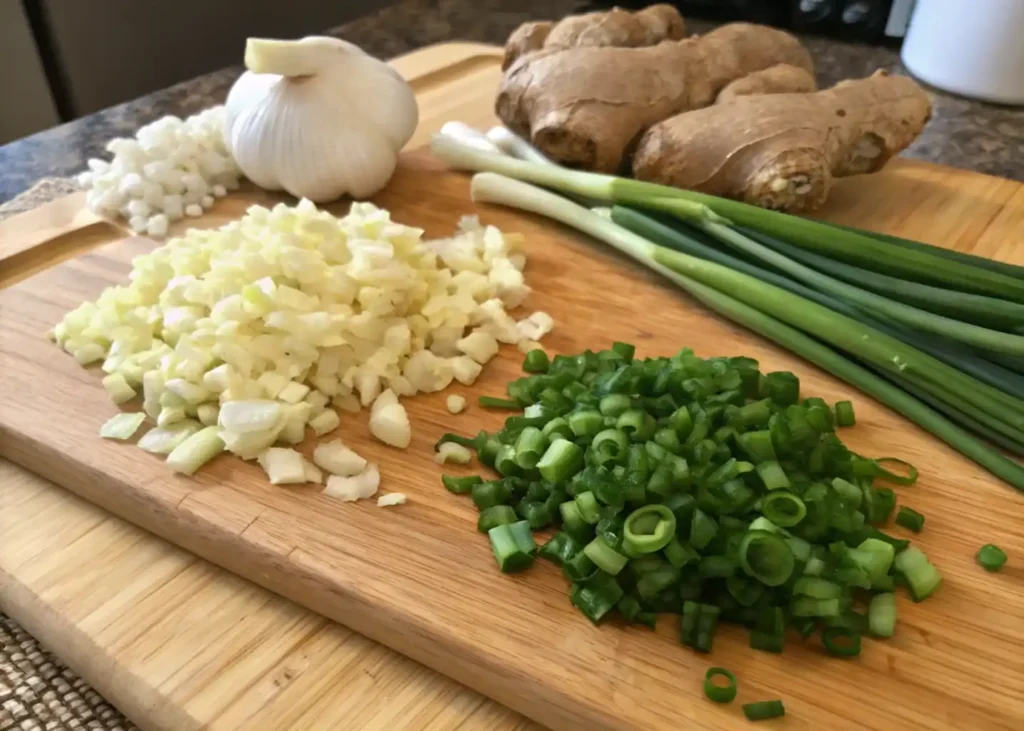
Grab your garlic, ginger, and green onions. Chop, mince, slice — whatever feels easiest. (To be honest with you, I sometimes just smash the garlic with the side of a knife when I’m in a rush. No shame in shortcuts.)
Step 2: Brown the Ground Beef
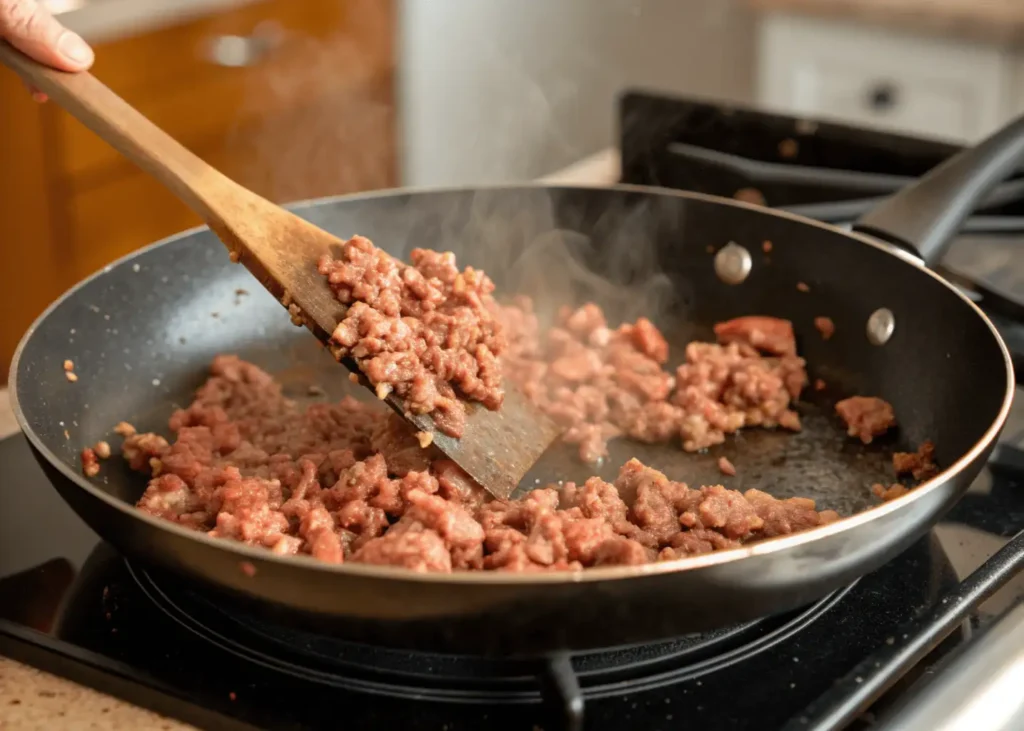
Toss the beef into a hot skillet. Let it sizzle for a minute before breaking it apart — that’s how you get those irresistible browned bits. Don’t stir it to death. I once made that mistake, ended up with steamed beef, and honestly, it was sad.
Step 3: Build the Sauce

While the beef cooks, mix soy sauce, sugar, sesame oil, garlic, and ginger in a small bowl. Pour it over the meat and watch as the kitchen suddenly smells like your favorite takeout spot. (Quite frankly, the smell alone can pull family members into the kitchen before you’re ready to serve.)
Step 4: Simmer & Absorb
Turn the heat down a little and let the beef soak in that sweet-savory goodness. Two or three minutes is enough. Believe it or not, this step is where the magic happens — the sauce clings to every bite.
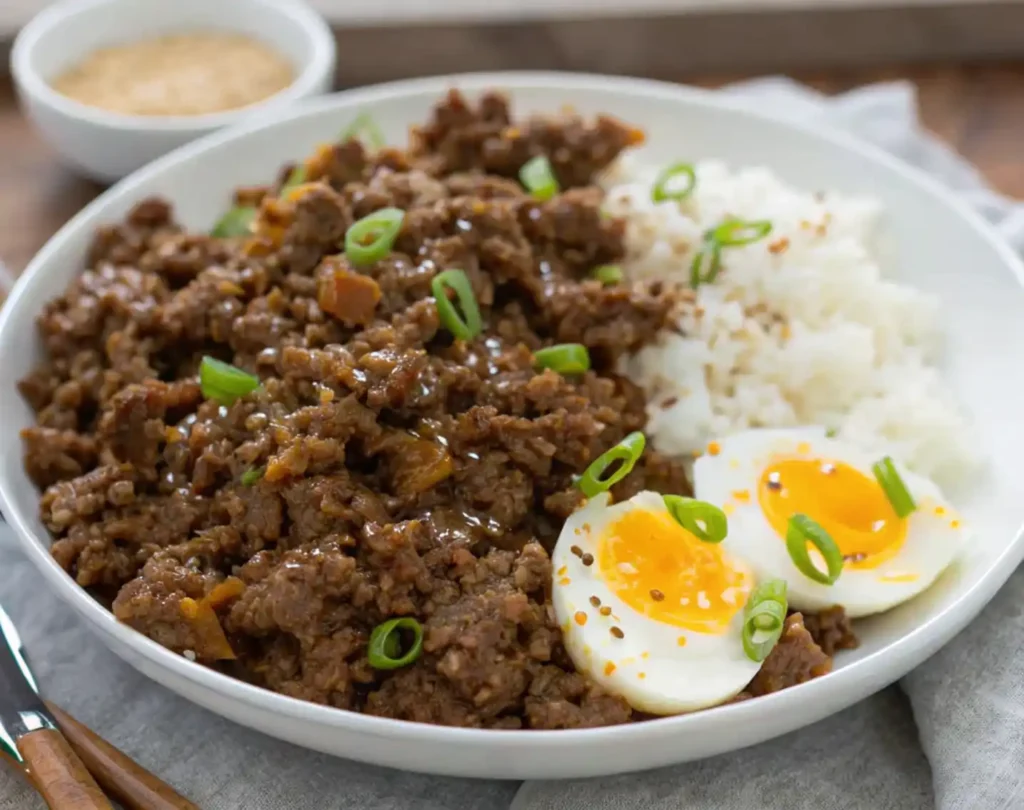
Step 5: Finish & Garnish
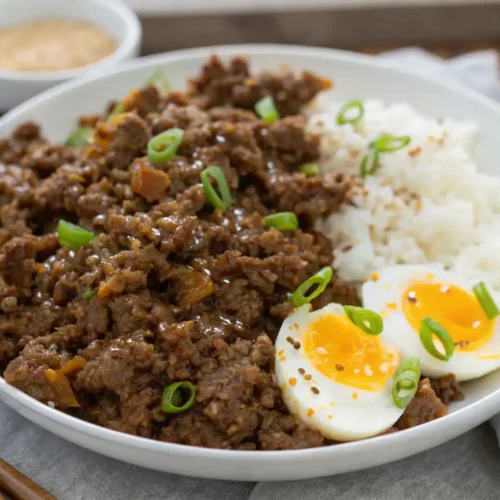
Sprinkle green onions and sesame seeds over the top. If you’re feeling extra, slide a fried egg on there. Bottom line: that egg yolk running into the beef makes the dish unforgettable.
Professional Cooking Tips
- Don’t crowd the pan — beef needs space to brown.
- Fresh aromatics beat powdered versions every time.
- Adjust sweetness or saltiness to your taste.
- A splash of rice vinegar cuts through richness.
How to Serve Ground Beef Bulgogi
- Classic: serve Ground Beef Bulgogi over hot steamed rice.
- Fun twist: scoop into tortillas for Korean tacos.
- Healthy: spoon into lettuce cups with shredded carrots.
- Comforting: add a fried egg on top (runny yolk heaven).
How to Store and Reheat
Store Ground Beef Bulgogi in an airtight container in the fridge for up to 4 days. For longer storage, freeze portions for 2 months. To reheat, warm gently in a skillet with a splash of water or broth to loosen the sauce. Microwave works too, but stir halfway so it heats evenly. Believe it or not, leftovers taste even better the next day.
More Recipes to Try
- Gluten Free Beef Stroganoff: Best Tips for Rich Flavor
- No Peek Beef Tips: how to make it perfect
- How to Make Pikes Peak Roast Beef recipe
- Garlic Butter Steak Bites: 5 Secrets to the Best Flavor
- How to Make Beef Quesadillas Recipe: A Simple Step-by-Step Guide
- Ground Beef Bulgogi
- Korean Ground Beef Bulgogi
Nutritional Information
(per serving, approx.)
- Calories: 370
- Protein: 22g
- Fat: 18g
- Carbohydrates: 28g
- Fiber: 2g
- Sodium: 780mg
What Is Ground Beef Bulgogi and How to Make It?
Ingredients
- Ground beef: Aim for 85/15 fat ratio
- Soy sauce: The salty backbone of the dish
- Brown sugar or honey
- Garlic & ginger
- Sesame oil
- Green onions
- Rice or noodles:
Instructions
Step 1: Prep the Aromatics
- Chop garlic, mince ginger, slice green onions. Have them ready because once the beef hits the skillet, everything moves quickly.
Step 2: Brown the Ground Beef
- Heat your skillet, add the beef, and break it apart. Don’t stir constantly — let it sit so it gets those crispy browned bits (the flavor payoff is huge).
Step 3: Build the Sauce
- While beef cooks, whisk soy sauce, brown sugar, sesame oil, garlic, and ginger. Pour it in and watch the magic happen.
Step 4: Simmer & Absorb
- Turn the heat down slightly, let the beef soak in the sauce for 2–3 minutes. The smell alone could convince anyone to linger in the kitchen.
Step 5: Finish & Garnish
- Top with green onions and sesame seeds. If you want extra richness, slide a fried egg on top — trust me, it’s worth it.
Notes
Nutritional Information
(per serving, approx.)- Calories: 370
- Protein: 22g
- Fat: 18g
- Carbohydrates: 28g
- Fiber: 2g
- Sodium: 780mg
FAQs
What is Ground Beef Bulgogi?
Think of it as bulgogi’s laid-back cousin. Traditional bulgogi uses thinly sliced ribeye, but Ground Beef Bulgog is faster, cheaper, and honestly, just as satisfying. (And here was the surprise — my kids actually prefer this version over the steak one.)
What are the key ingredients in the sauce?
The heart of it is soy sauce, brown sugar, garlic, ginger, and sesame oil. Simple, right? From my point of view, it’s that balance of salty, sweet, and nutty that makes you want a second helping.
What kind of ground beef is best to use?
I recommend 85/15. Enough fat to stay juicy without leaving a greasy mess. I once tried using 95% lean, and let me tell you something — it turned out dry as cardboar
Do I need to marinate the ground beef?
Nope, that’s the beauty of it. The sauce cooks right in. (I don’t keep you a secret — I love skipping marinating steps when dinner needs to be fast.)
Can I add vegetables to the dish?
Absolutely. Toss in bell peppers, shredded carrots, broccoli, or zucchini. By the way, spinach wilts beautifully into the beef if you want a quick boost of greens.
Conclusion
Quite frankly, Ground Beef Bulgogi is the kind of meal that rescues your weeknight. Quick to cook, flexible, and bursting with flavor, it’s comfort food in every sense of the word. Try it out, share your version in the comments, and subscribe if you want more easy recipes that really deliver.
Leave a Comment
Your email address will not be published.
There are no reviews yet. Be the first one to write one.